Introduction
Hey everyone! Today, I’m going to show you how I deal with a muffled speaker or a muffled microphone. This is a very common issue, and I urge everyone to check their phone’s speaker and microphone mesh for any dust or debris. If you find anything, follow these steps to clean it out, as it will significantly improve the performance of your speaker and microphone.
Step 1: Diagnosing the Problem
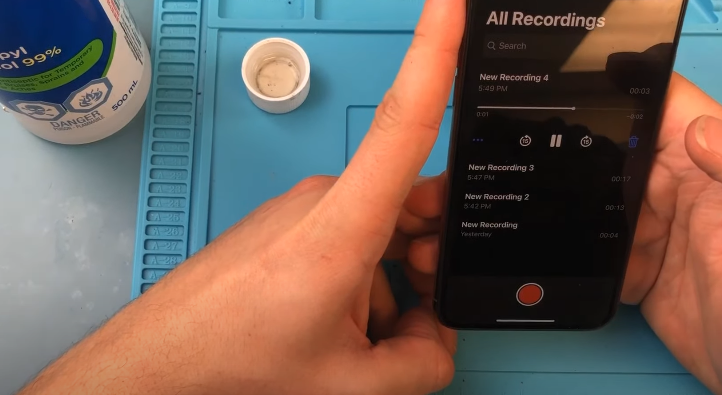
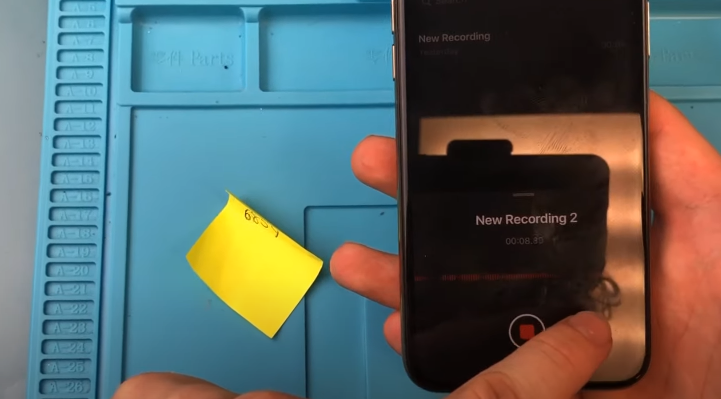
The first thing I did was open the Voice Memos app on my phone and recorded a new voice memo. This helped me evaluate how much sound the microphone was picking up and how the speaker sounded. As expected, the audio was really poor—it sounded as if something was pressing against the speaker or microphone, muffling the sound.
Step 2: Gathering the Tools
To properly clean the speaker and microphone mesh, you will need the following tools:
- Toothbrush
- Isopropyl alcohol (or any alcohol-based cleaning solution)
- Pointy tool (such as a toothpick or a spudger)
Step 3: Preparing the Cleaning Solution
Pour a small amount of isopropyl alcohol into a cap or a small container. Dip the toothbrush into the alcohol—it doesn’t need to be soaked, just damp enough to clean effectively.
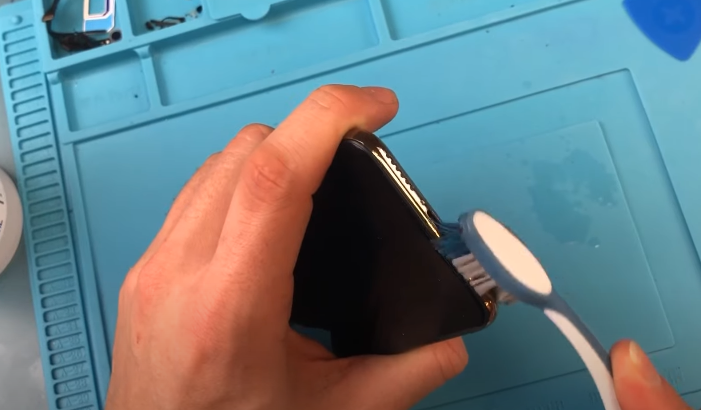
Step 4: Cleaning the Speaker and Microphone Mesh
- Turn your phone around so that the speaker and microphone mesh are accessible.
- Gently scrub the mesh with the damp toothbrush. Make sure the bristles penetrate the mesh, rather than just scrubbing the surface of your phone.
- Scrubbing helps loosen up any dust or debris that may have accumulated over time.
Targeting Specific Areas
- Microphone (left side of the phone): Pay extra attention to the microphone mesh, as it tends to gather more debris.
- Speaker (right side of the phone): Clean this area thoroughly as well, since it often collects lint, sand, and other particles.
Step 5: Using the Pointy Tool
Once you’ve loosened the debris with the toothbrush, grab your pointy tool (toothpick or spudger) and start carefully scooping out the dirt from the mesh.
Important Tips:
- Be gentle to avoid pushing debris further inside.
- Use a flicking or scooping motion to remove the dirt.
- Avoid applying too much pressure, as you could damage the mesh.
Repeat this process a few times until you can clearly see the metal mesh underneath. This may take three or four rounds of cleaning.
Step 6: Final Check
After cleaning, test the speaker and microphone again by recording a new voice memo. You should notice a significant improvement in sound quality. Here’s how my test sounded after cleaning:
“Hello, testing one two three. Hello, testing one two three.”
The improvement was obvious, and the muffled sound was gone.