Customizing your tech can make it uniquely yours, and today, we’re diving into the ultimate iPhone 7 Plus customization. From a glowing Apple logo to gold-plated finishes and speaker mods, this project aims to create the most personalized iPhone 7 Plus ever. Here’s a breakdown of the journey.
Step 1: Setting the Stage
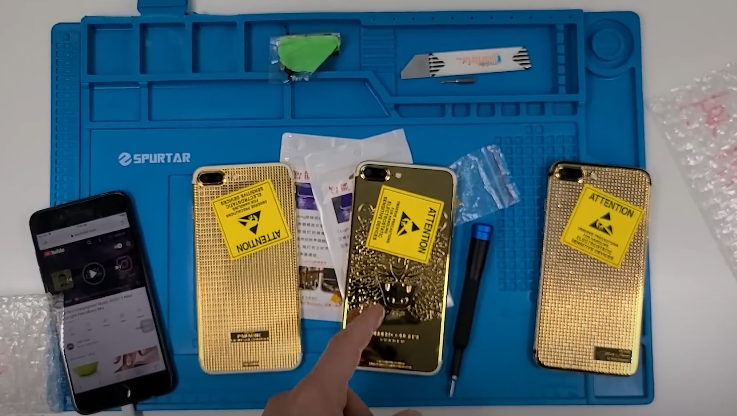
If you’ve been following this project, you know we’re all about pushing the limits of customization. So far, we’ve already installed a glowing Apple logo and a partially completed speaker mod. Now, we’re taking things to the next level with a stunning gold housing that was chosen by popular vote.
Step 2: Preparing for the Upgrade
Before jumping into the assembly, we gathered tools and materials:
- Gold Housing: Pre-installed with volume buttons and an NFC chip.
- Speaker Mod: To be properly installed for symmetrical sound and visuals.
- Apple Logo Mod: To complement the gold aesthetic.
Disassembling the iPhone
With the bottom screws already removed, we:
- Opened the phone and removed the battery and screen.
- Carefully unscrewed and removed the antenna, logic board, charging port, and loudspeaker.
Despite minor hiccups—like breaking the volume and power buttons previously—the pre-installed replacements in the gold housing saved time.
Step 3: Cleaning and Assembling the Gold Housing
With all parts laid out, we turned our attention to the new housing.
Cleaning Residue
A toothbrush and isopropyl alcohol were used to remove adhesive residue. The housing was polished to perfection, revealing its 24-karat gold finish.
Installing Components
Step-by-step, we transferred components from the original phone to the gold housing:
- Charging Port: Carefully aligned and secured with screws from a donor housing.
- Logic Board and Buttons: Installed seamlessly.
- Speaker Mod: This required precision as it involves connecting delicate components.
We made a bold decision to remove the protective panel over the speaker mod for better visibility, despite compromising water and dust resistance.
Step 4: Final Assembly
With all components installed, we moved on to the finishing touches:
- Installing the Apple Logo Mod: Adhesive ensured the glowing logo was secure.
- New Battery: A fresh battery was used for optimal performance.
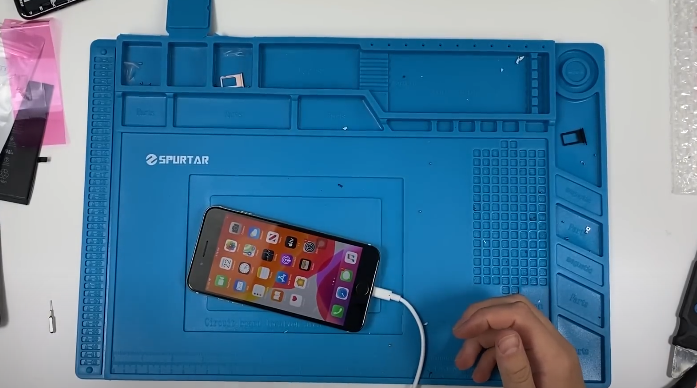
- Reattaching the Screen: All connectors were secured before powering up.
Step 5: Testing and Showcase
When we powered on the phone, the glowing Apple logo and speaker mod worked flawlessly, creating a striking visual effect. The gold screws and diamond-studded SIM tray added an extra touch of luxury.
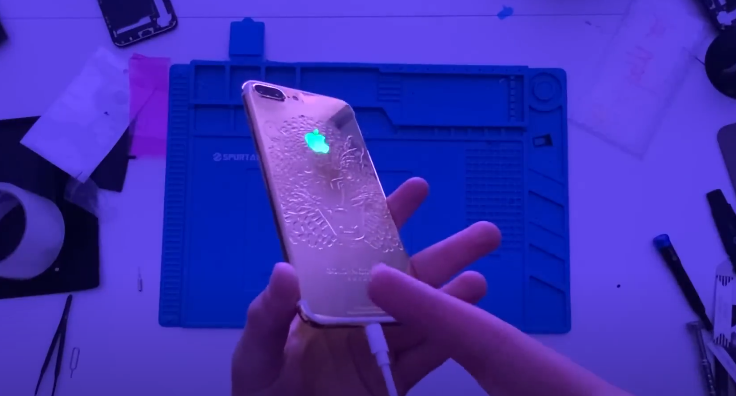
Light Show
To highlight the customization, we turned off the lights and admired the glowing elements in action.
Reflections and Next Steps
This journey to create the most customized iPhone 7 Plus was challenging but rewarding. The final result exceeded expectations, combining style and functionality in a unique way.
What’s Next?
We’re already brainstorming future mods:
- A transparent screen for a futuristic look.
- Wireless charging integration.
